
Sikku kolam No. 1, stitched with running stitch in DMC Pearl Cotton #5 (959) and wrapped wheel stitch in 825 and 961, onto muslin.
About the Design
Kolam is a South Indian tradition of drawing patterns on the ground at the doorstep, often at dawn, in rice flour. By evening, footsteps have scuffed it away, and the next morning it’s drawn again. Sikku kolam is the kind where one continuous line loops around a grid of dots without ever touching them. Sikku means tangle or knot, which describes the crossings well.
The dots (pulli) are the fixed points of a kolam, and the line is drawn around them. I stitched each one as a small wheel so they would stay visible once the pattern was in cloth.
I’m not a practitioner of this tradition. I was drawn to these patterns for their beauty and adapted this one as a stitch pattern. Stitching makes it permanent, which is the opposite of what the original is for, so I think of it as inspired by kolam, not a kolam itself. If the tradition interests you, look for the work of kolam practitioners.
As I read Marcia Ascher’s writing on kolam, I was struck by how the practice is passed down. Girls learn it from the women in their families, who teach them the figures, how to draw them, and which belong to everyday and which to special occasions. Ascher also describes it as an oral tradition within a literate culture, and that stayed with me, because most of what passes between generations, even in cultures that read and write, is shared by voice and by hand. I recognize that from my own life. I call it Embodied Inheritance: knowledge of stitching and mending absorbed across generations, often without anyone saying “this is how it’s done.” My experience belongs to a different tradition and isn’t the same thing, but I felt the kinship, and it’s part of why these patterns stayed with me.
How I Stitched It
The stitching is simple. A pale green running stitch (DMC 959) follows the continuous line, and a small blue wheel (825) with pink spokes (961) fills each of the sixteen dots. The line goes around the dots without touching them, so the wheels sit in open space inside each loop. Slightly uneven stitches give the line its life, so don’t worry about matching every one. It works for a first embroidery project and for an evening when you just want a needle and a quiet hour.
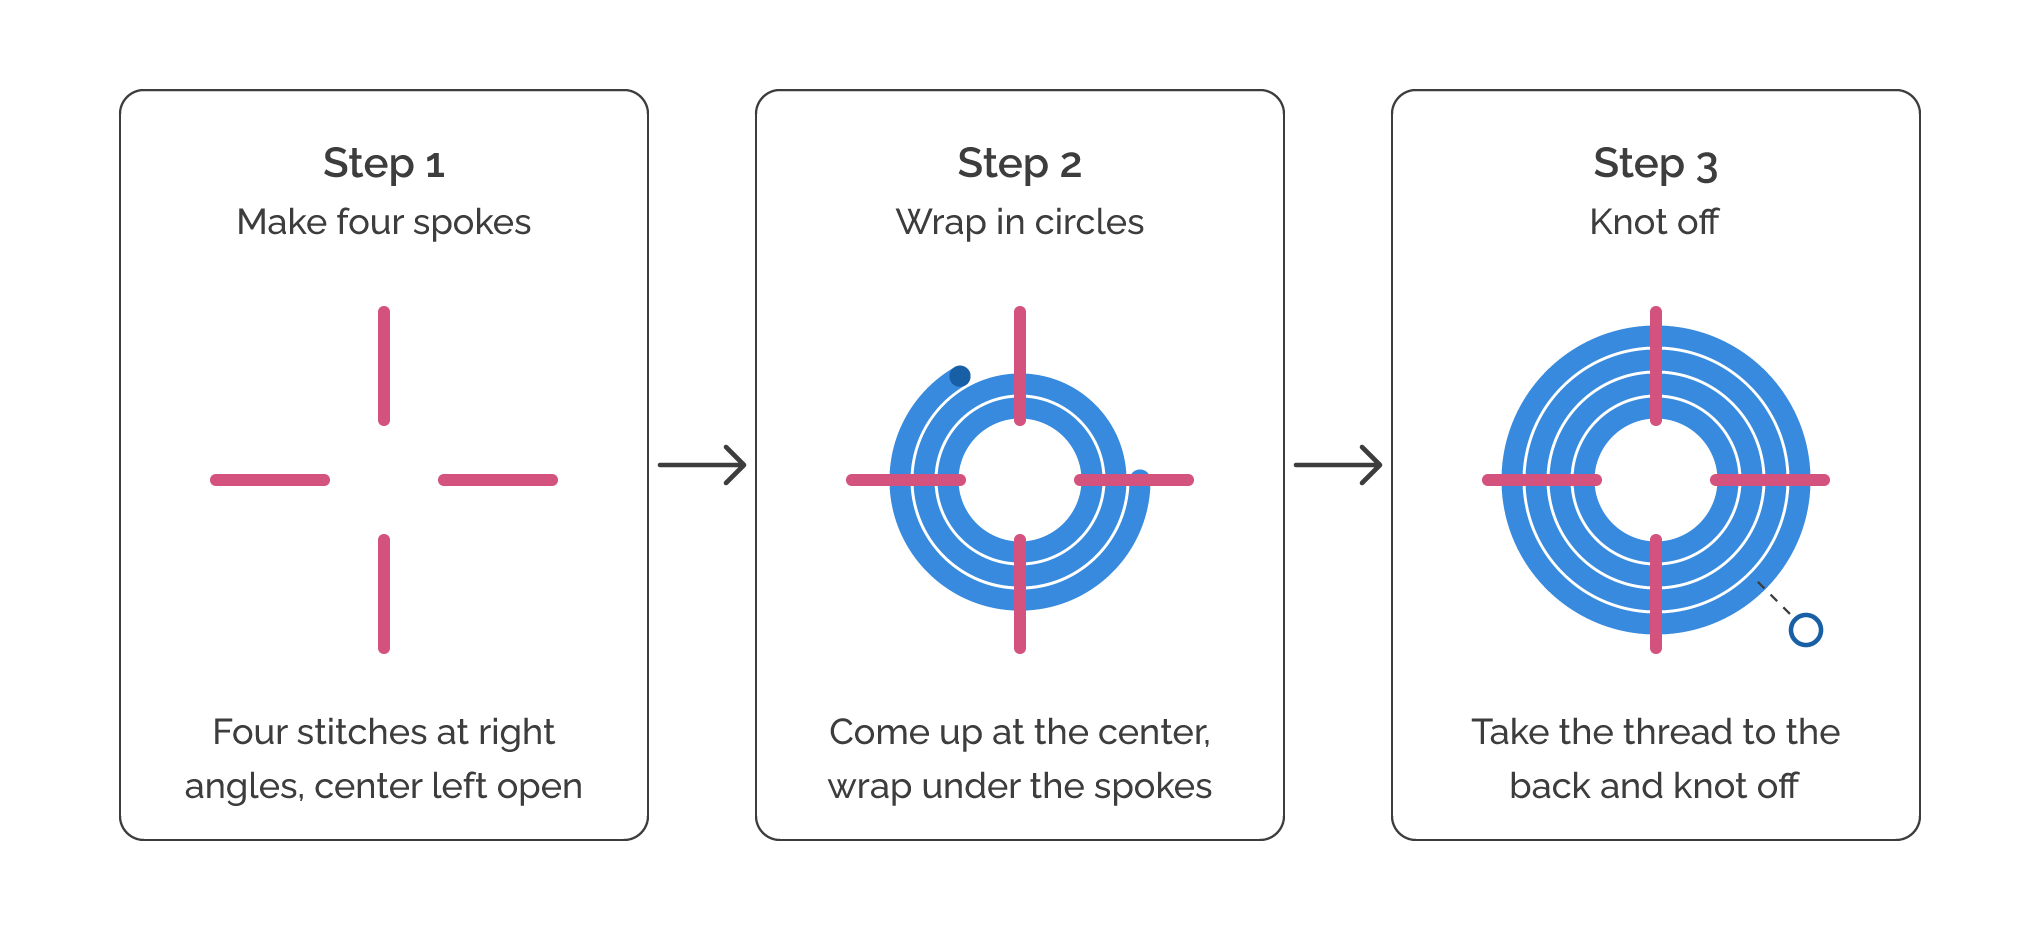
Wrapped wheel in blue with pink spokes, stitched inside each loop
Stitching the Dots
Each dot is a wrapped wheel stitch: four spokes, then thread wound around them in circles. I used pink (961) for the spokes and blue (825) for the wrapping, and left the center open so the dot stays visible inside its loop. Wrap until the spokes are covered, or stop sooner for a looser, more open wheel.
Mending and Materials
A continuous line is also a nice thing to practice if you do visible mending. The same running stitch that draws these loops can reinforce a thin patch, close a tear, or follow the edge of a repair. Nothing here is hidden, and the thread shows where the work happened.
You don’t need to buy anything to begin. Use a scrap of cotton or linen, a worn napkin, or the back of a shirt that needs attention, and any thread you already own. The pattern is open to your own colors and stitches. The colors I used are DMC 959, 825 and 961, but they’re only my choices.
Get the Pattern
Download the free pattern PDF below, print it at 100% scale, and transfer it to your fabric. A window and a water-soluble marker work well. If you stitch one, I’d love to see it, so leave a comment and tell me what fabric and thread you chose.